Your club section comes with modules ready for your own content. This guide walks you through one, screen by screen.
Step 1 — Find your club’s modules
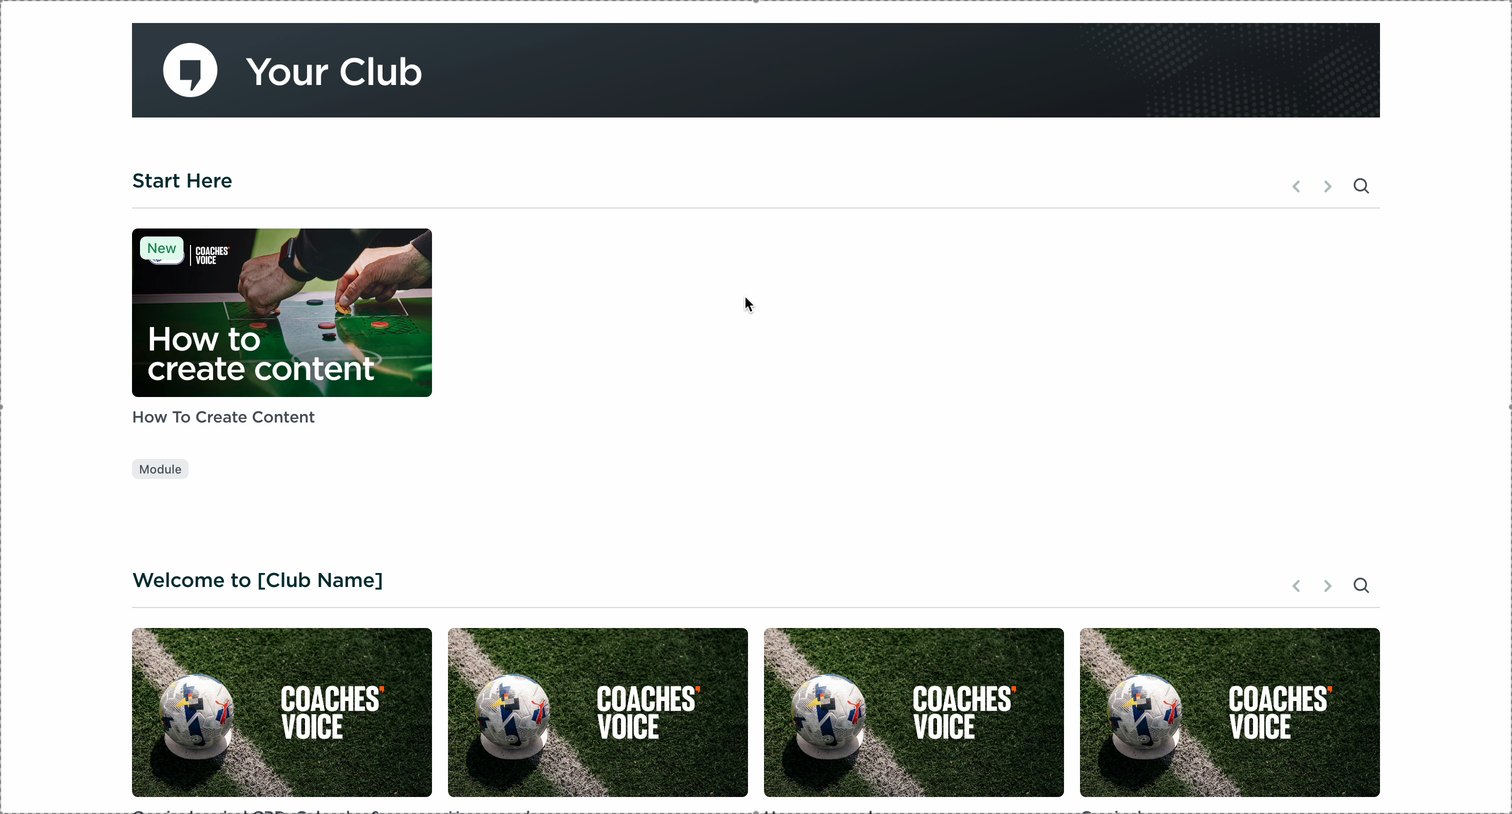
Everything starts on your home page, under My Learning.
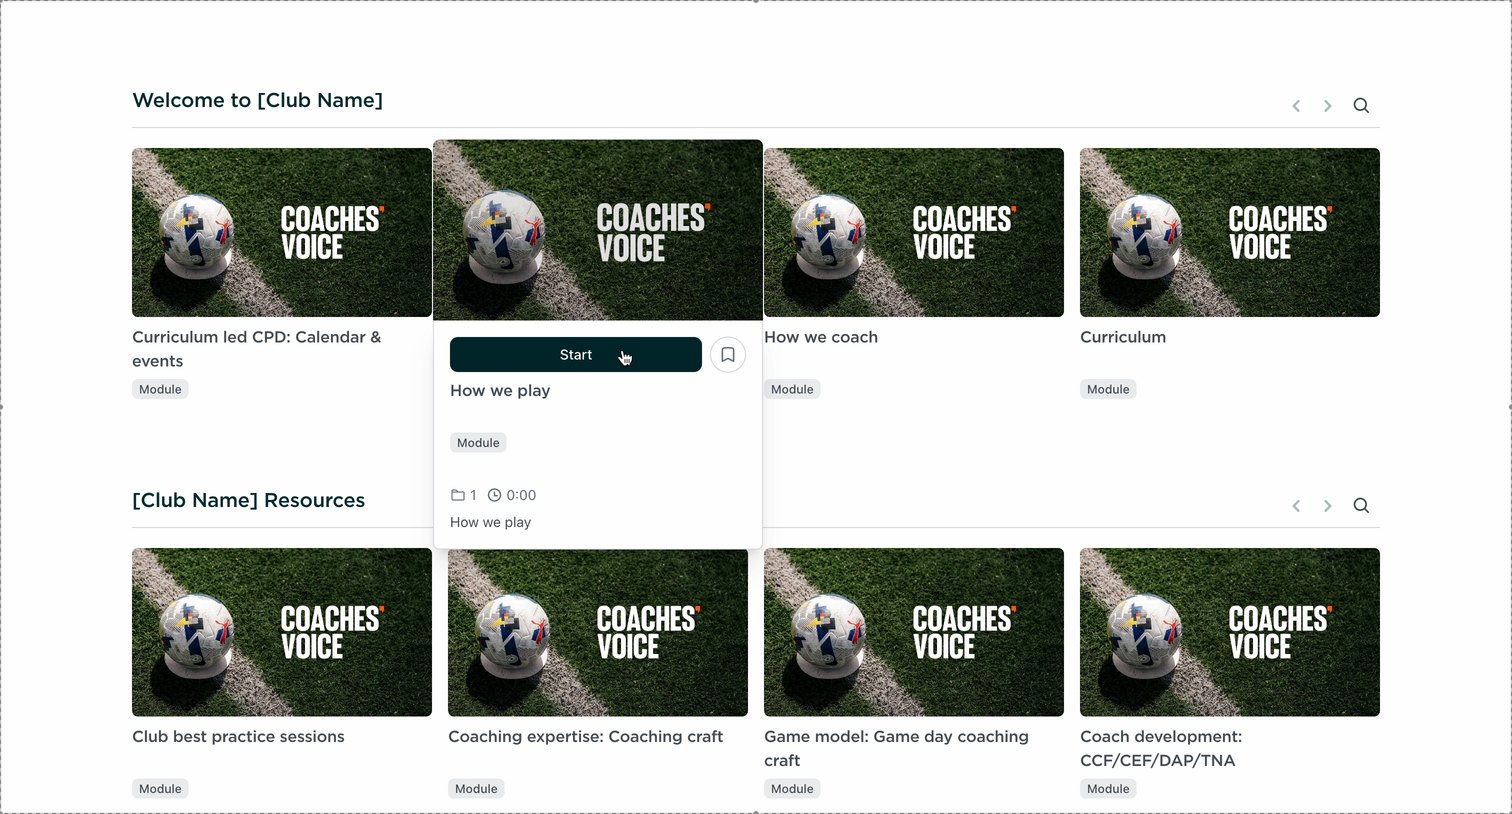
- Log in and go to My Learning.
- Scroll down to your club section. It’s branded with your club crest and name.
- You’ll see two rails: Welcome to [Club Name] and [Club Name] Resources.
- Hover over a module, then click Start.
The EFL Content rails higher up the page come from the league. Your club can’t edit them.
Step 2 — Open the module editor
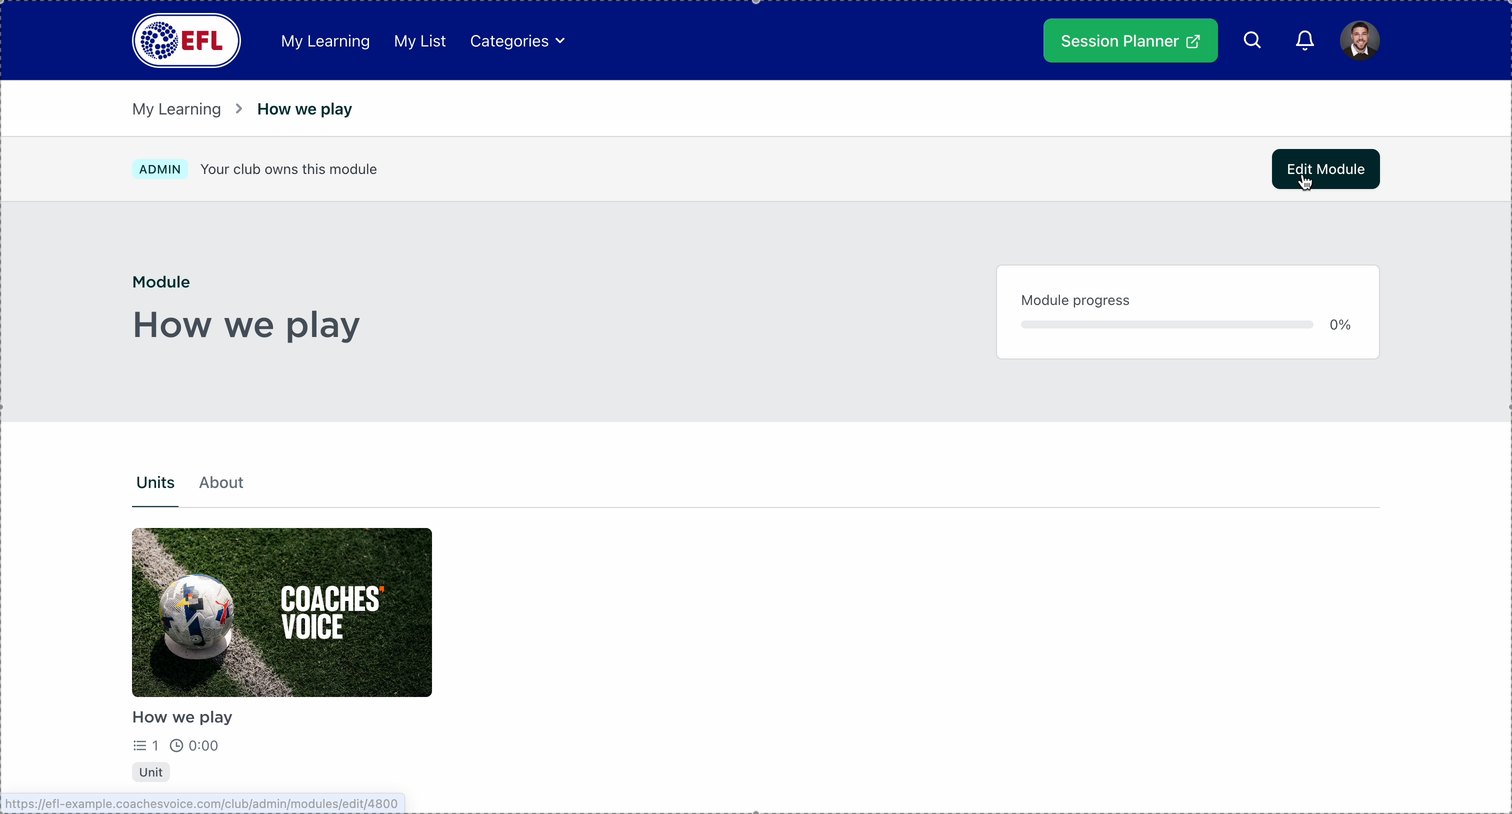
Once you’re in the module, click Edit Module in the top right corner.
The Admin tag next to Your club owns this module tells you the module is yours to edit.
Step 3 — Set the title and description
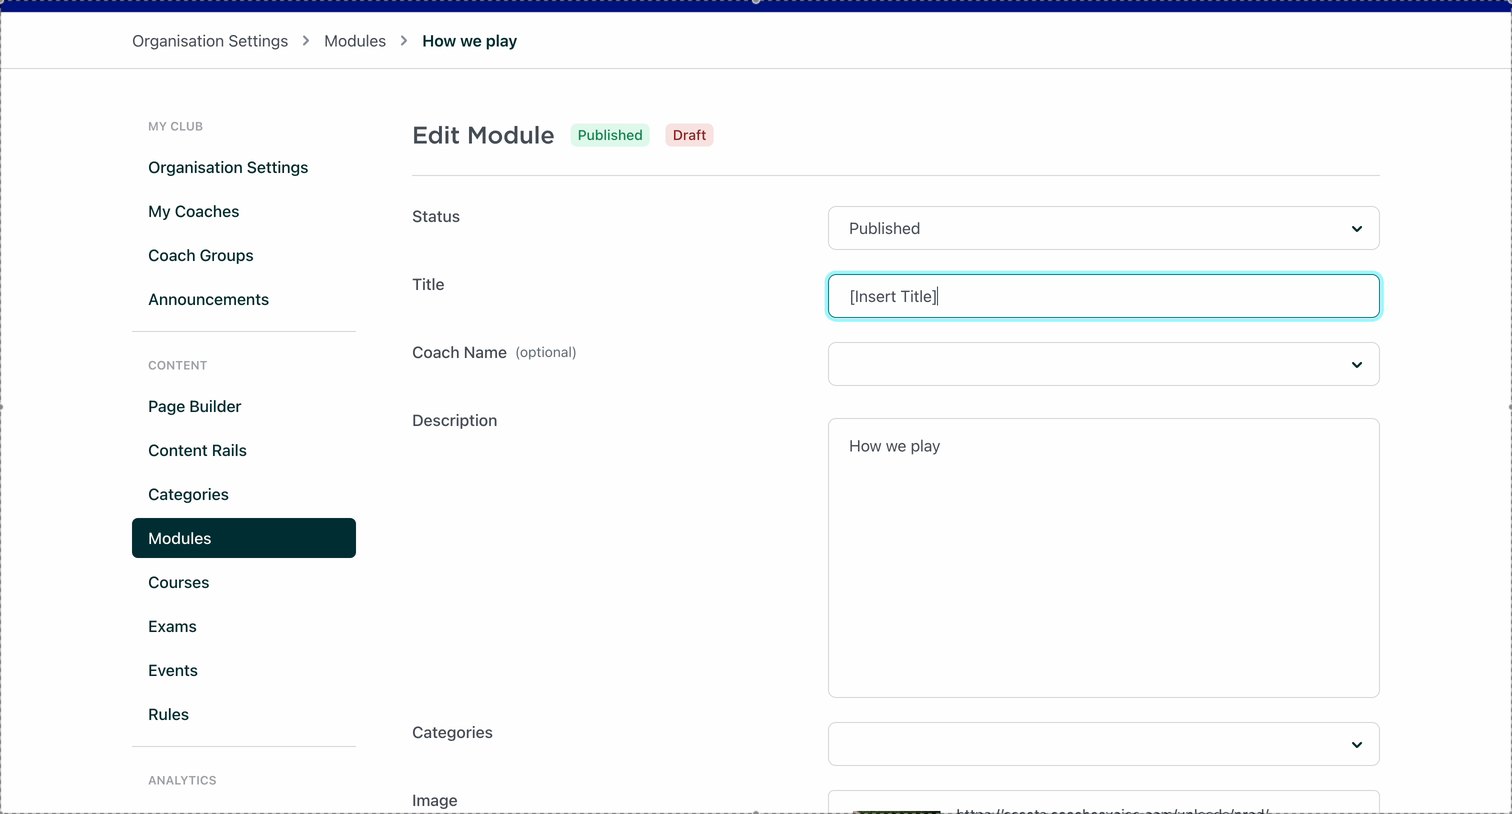
The title and the description are the two fields every module needs.
- Type your Title. Keep it short and recognisable to your coaches.
- Write a Description: one or two lines explaining what the module covers.
- Coach Name (optional). We don’t recommend using it unless the module is a session from a specific coach.
- Categories (optional). We don’t advise tagging modules unless you’re uploading a session.
Step 4 — Change the module image
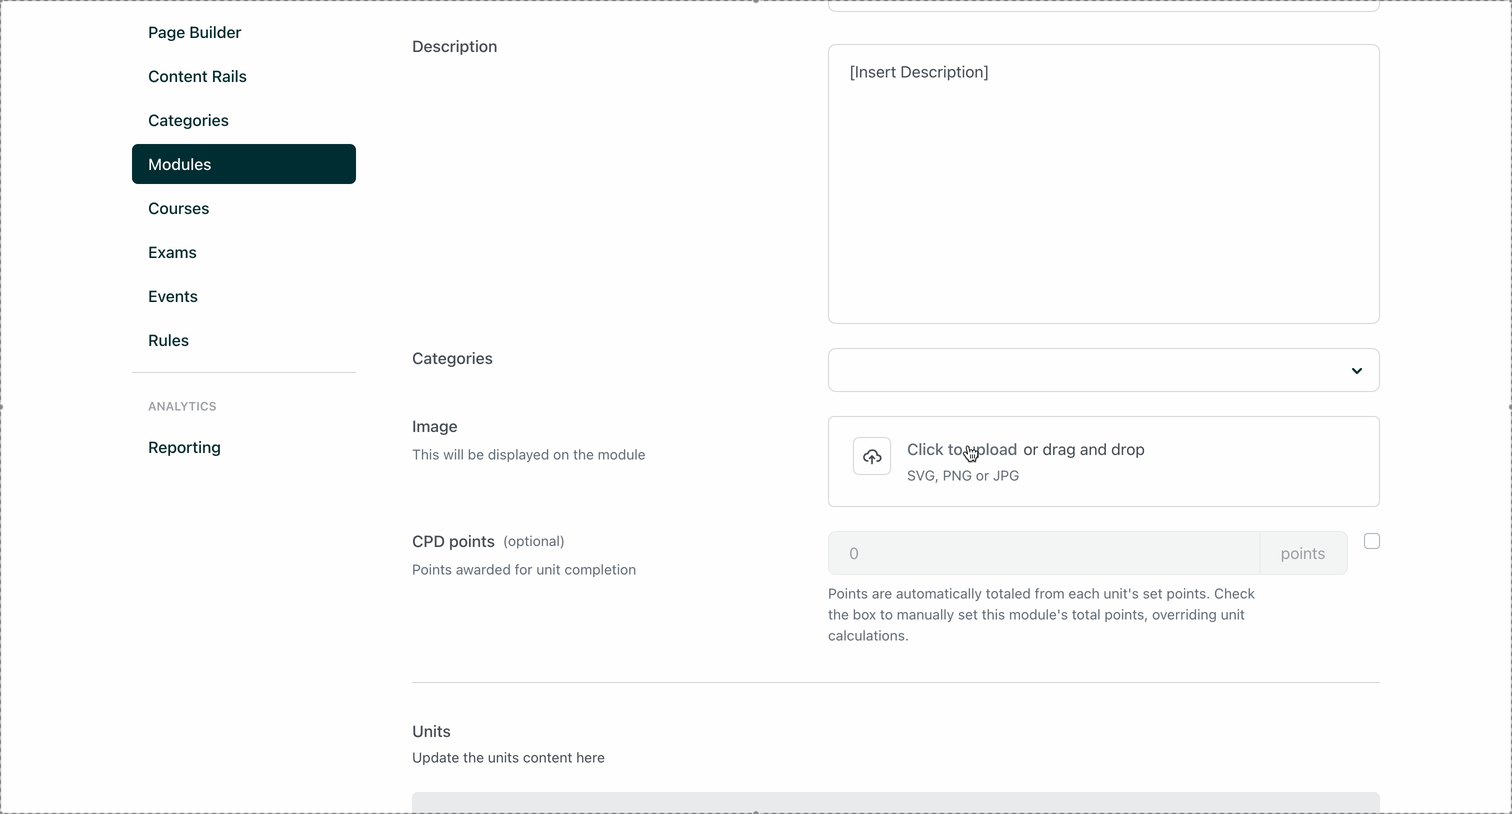
The image is the thumbnail coaches see on the module tile.
- Click the bin icon to the right of the current image to remove it.
- Click Click to upload, or drag your file in.
- Choose your file and upload it.
Accepted formats: SVG, PNG or JPG. Use a landscape image so it fills the tile properly.
Step 5 — Open the unit
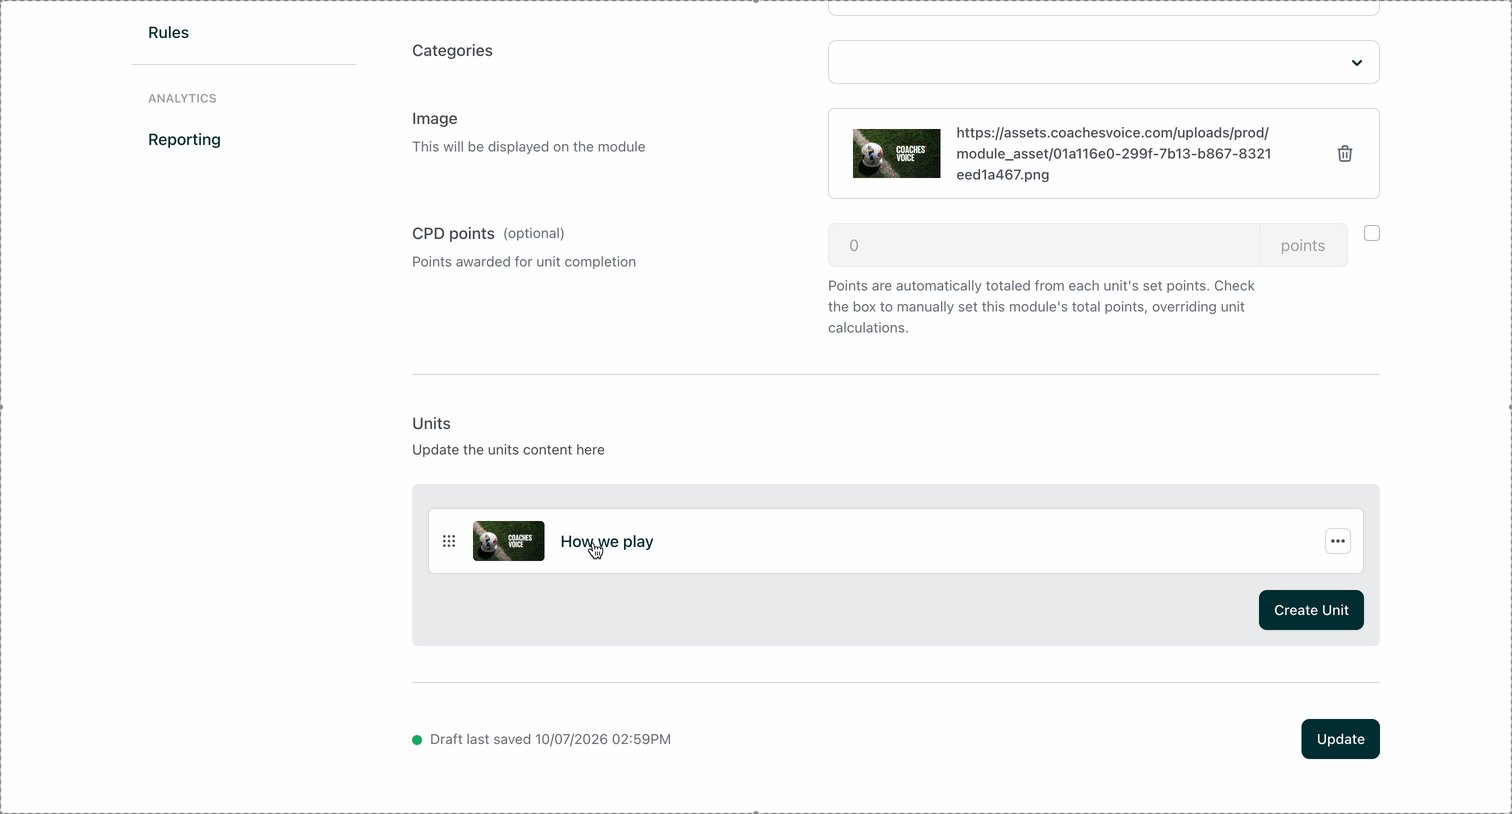
Scroll down the Edit Module screen to Units and click the unit to open it.
A module can hold as many units as you like — Create Unit adds another. Use one unit per topic or per session.
Step 6 — Set up the unit
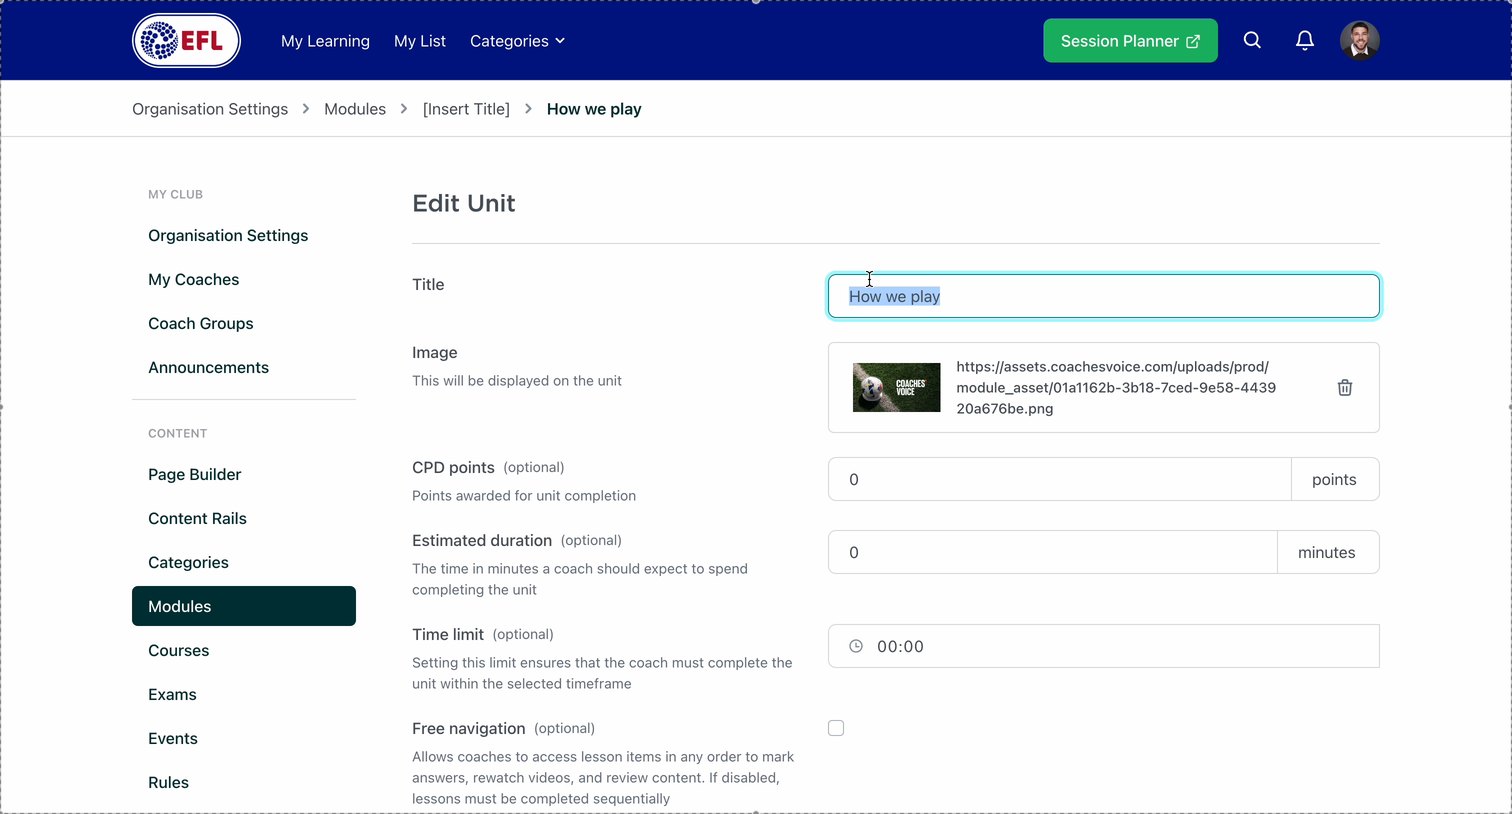
The Edit Unit screen controls how the unit behaves for your coaches.
- Title — keep it short and recognisable.
- Image — the thumbnail on the unit card.
- CPD points (optional) — points awarded when a coach completes the unit.
- Estimated duration — how long a coach should expect to spend.
- Time limit — leave at 00:00 unless you want a hard deadline.
- Free navigation — tick it to let coaches move between lessons in any order. Leave it unticked to make them go through in order.
Step 7 — Remove the placeholder content
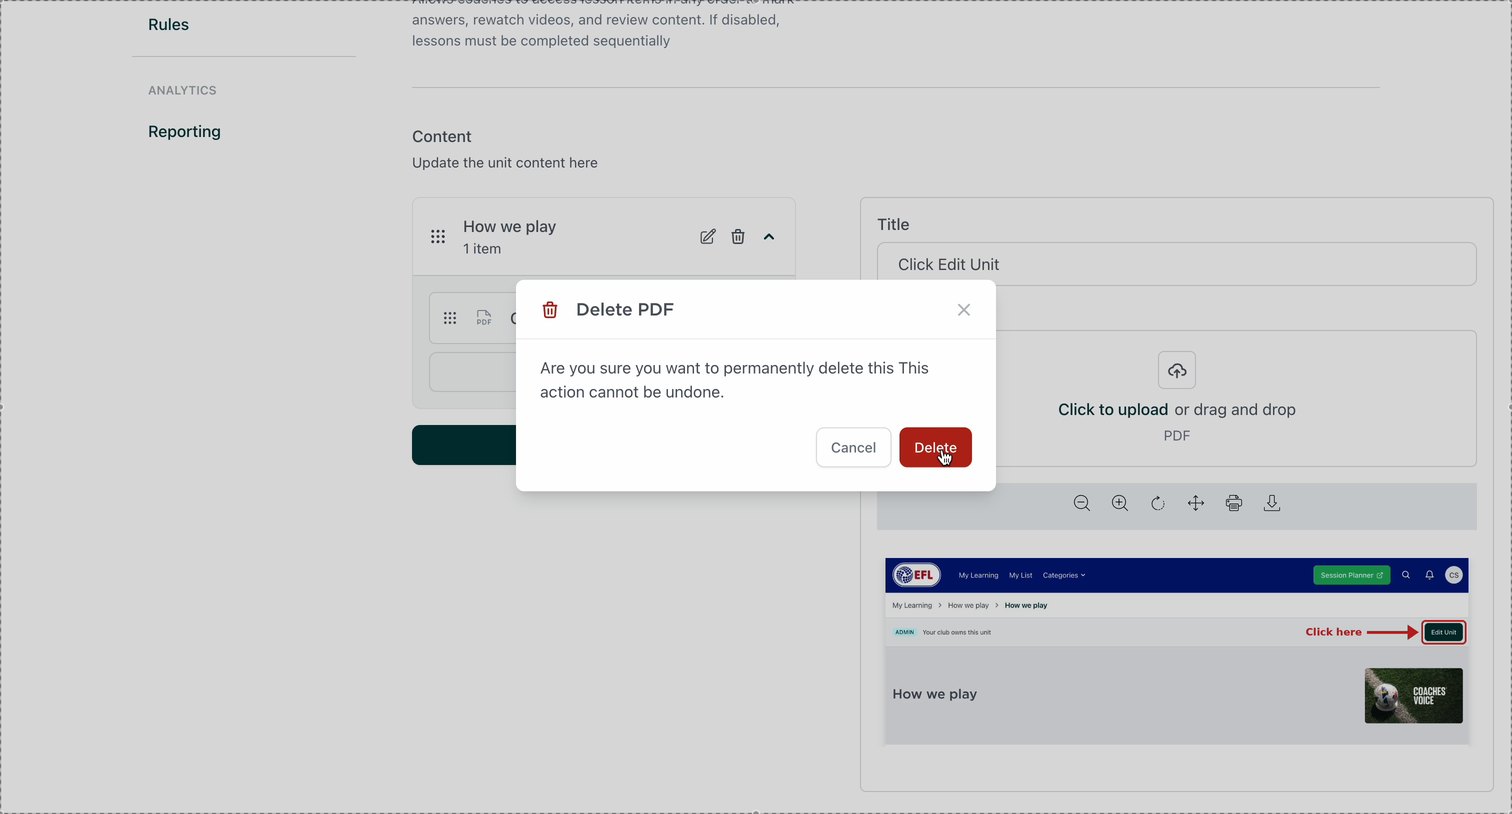
Each unit starts with a placeholder item. Take it out before you add your own content.
- Click the bin icon on the placeholder item.
- Click Delete to confirm.
Step 8 — Name your lesson
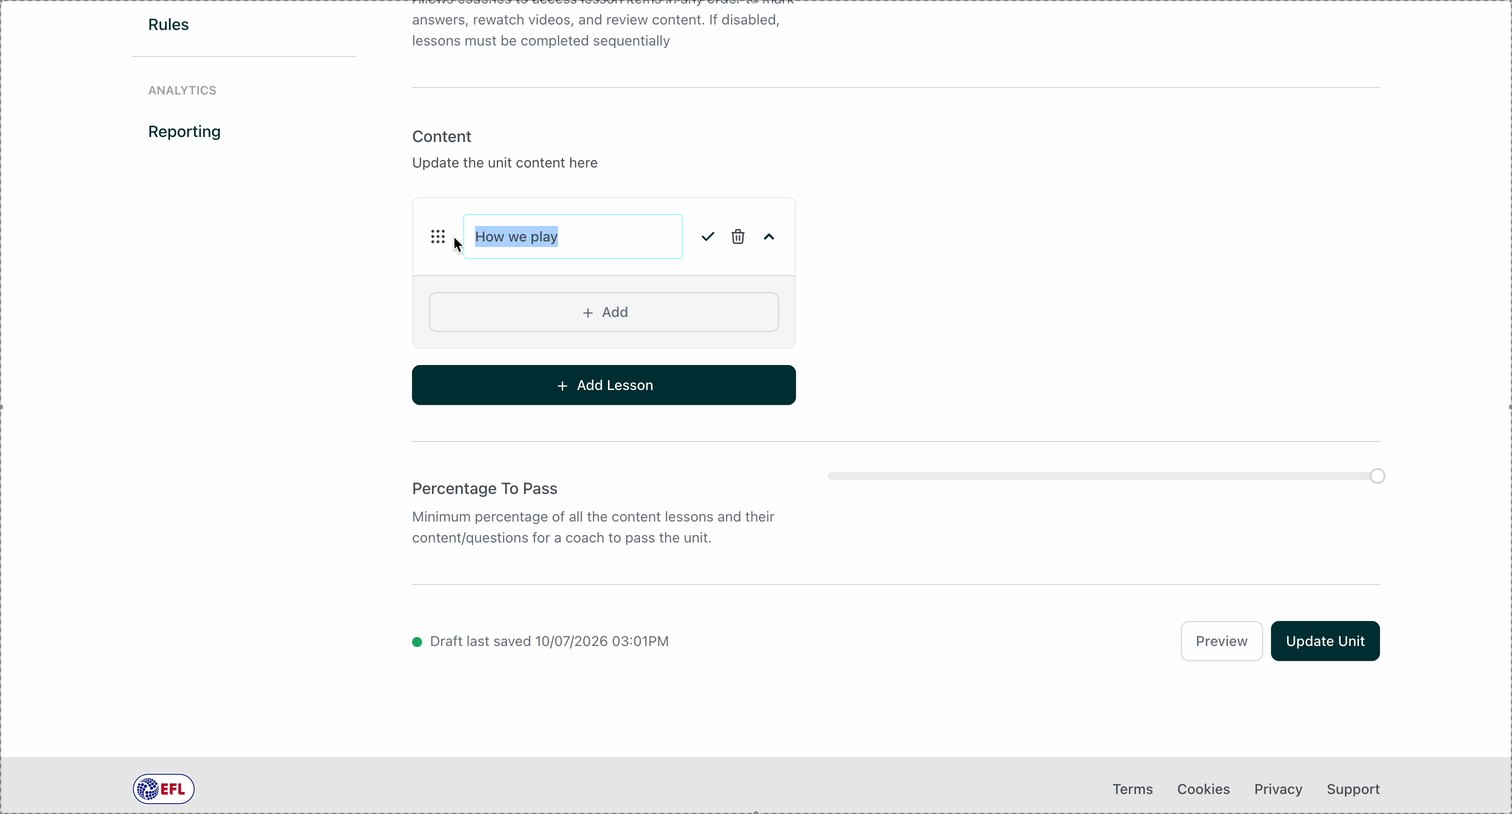
Lessons group your content inside the unit. Give each one a clear title.
- Click the pencil icon next to the lesson name.
- Delete [Insert Lesson Title] and type your own title.
- Tick the box, or press Enter, to confirm.
Step 9 — Add your content
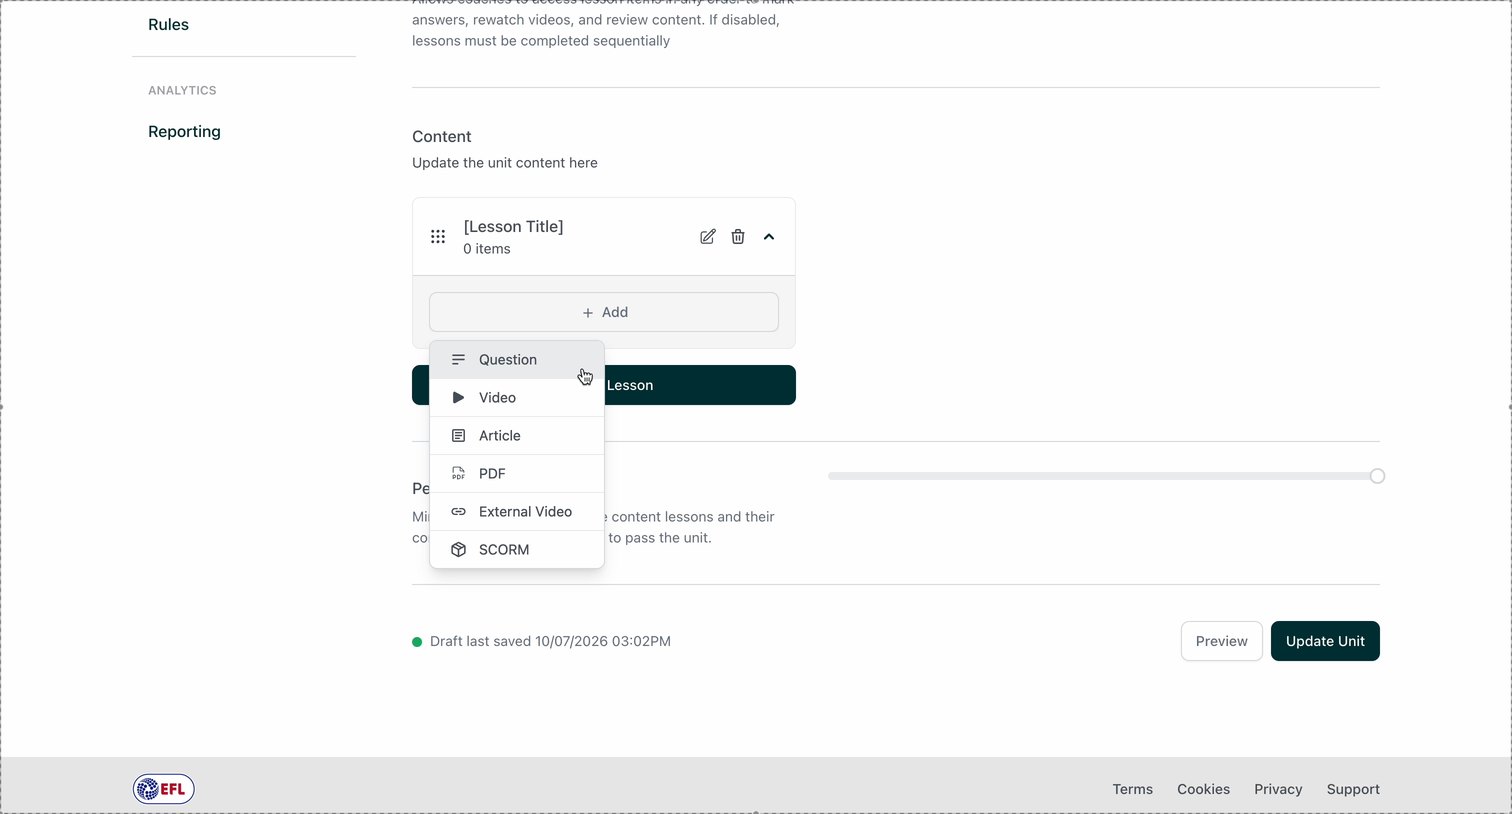
Click + Add. There are six content types:
- Question — a question with answers you mark as correct. If you add one, tick the circle next to the correct answer, or it can’t be marked.
- Video — uploaded directly. MP4 only.
- Article — text, with a title and body.
- PDF — an uploaded document.
- External Video — a YouTube or Vimeo link.
- SCORM — an interactive package (.zip).
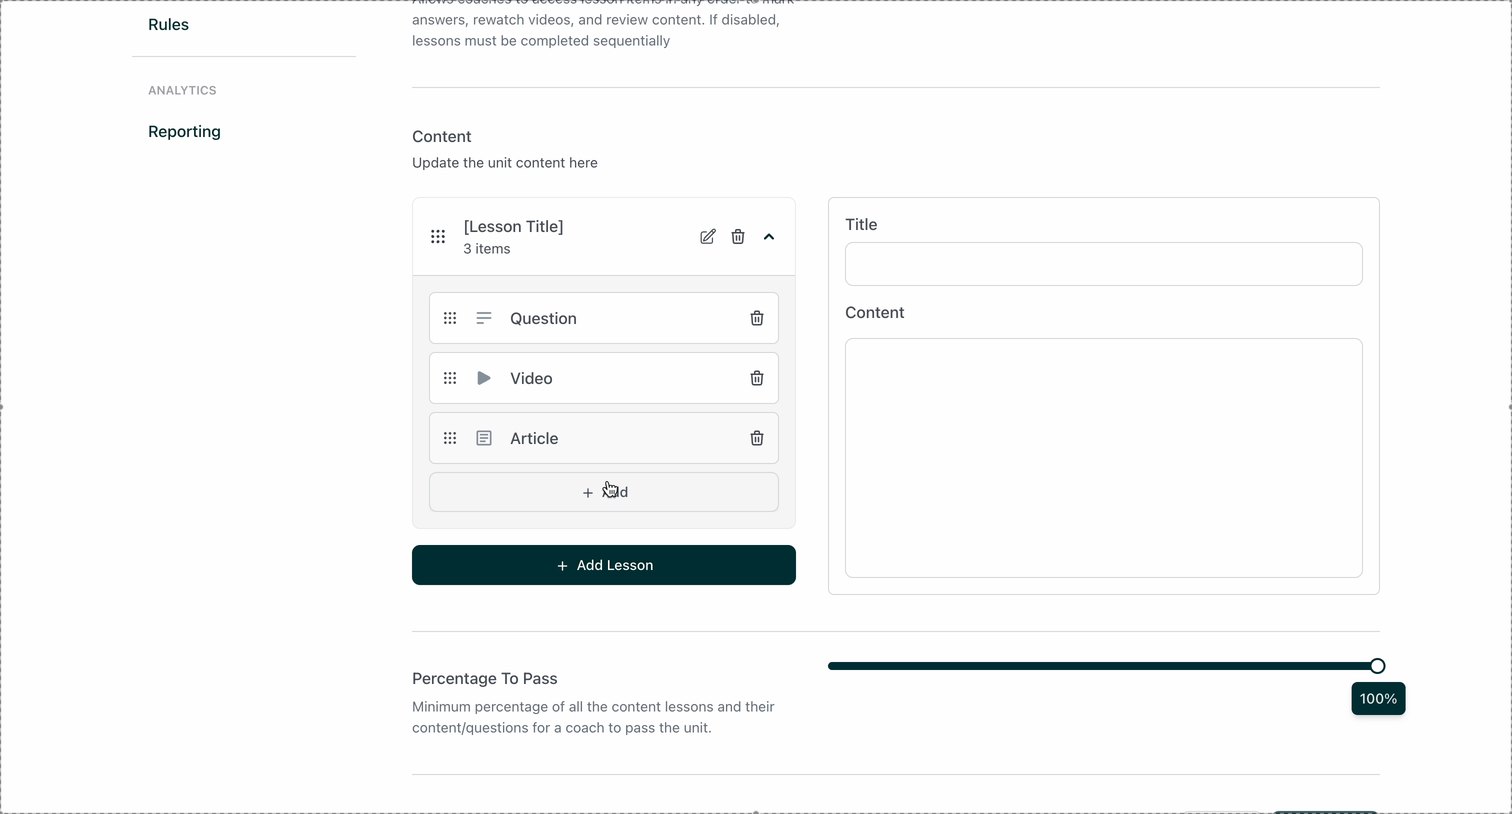
Use whichever suit your content — none are required. Add as many items as you need, and drag the handle on the left of an item to reorder it. Click Add Lesson to add more lessons.
Step 10 — Check the percentage to pass
Below the content you’ll find Percentage To Pass.
It’s the minimum share of the unit’s content a coach must complete to pass. Leave it at 100% unless you have a reason to lower it.
Step 11 — Preview the unit
Check the unit the way a coach will see it, before anyone else does.
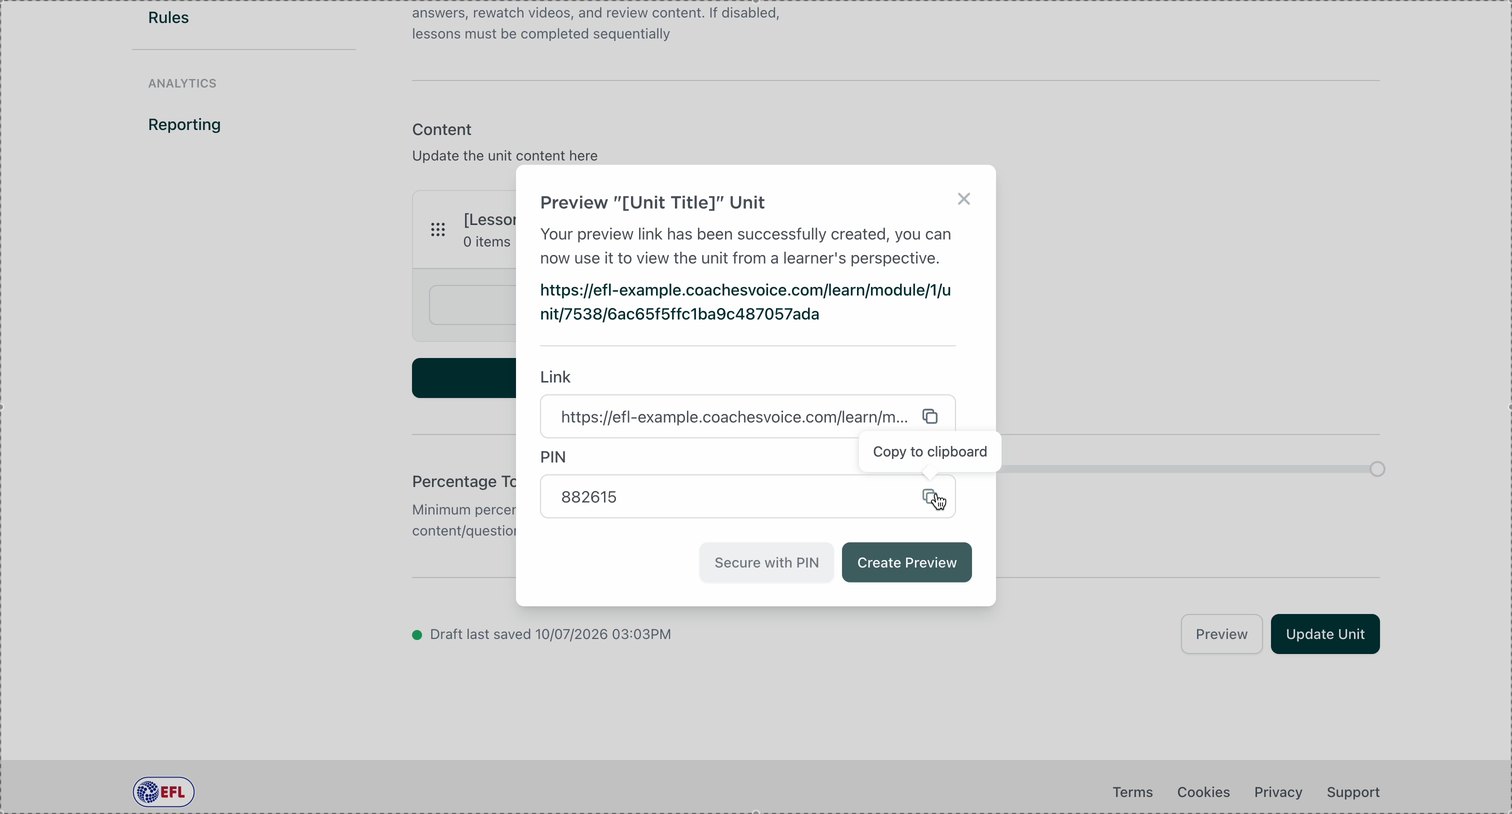
- Click Preview at the bottom of the unit.
- For a private link, click Secure with PIN.
- Copy the link to your clipboard and open it in a new tab.
- The page stays locked until you enter the PIN.
Create Preview makes an open link instead — anyone who has it can view the unit. Changes you make after creating a link won’t show until you create a new one.
Step 12 — Save and publish
Nothing is live until you save — in both places.
- At the bottom of the unit, click Update Unit.
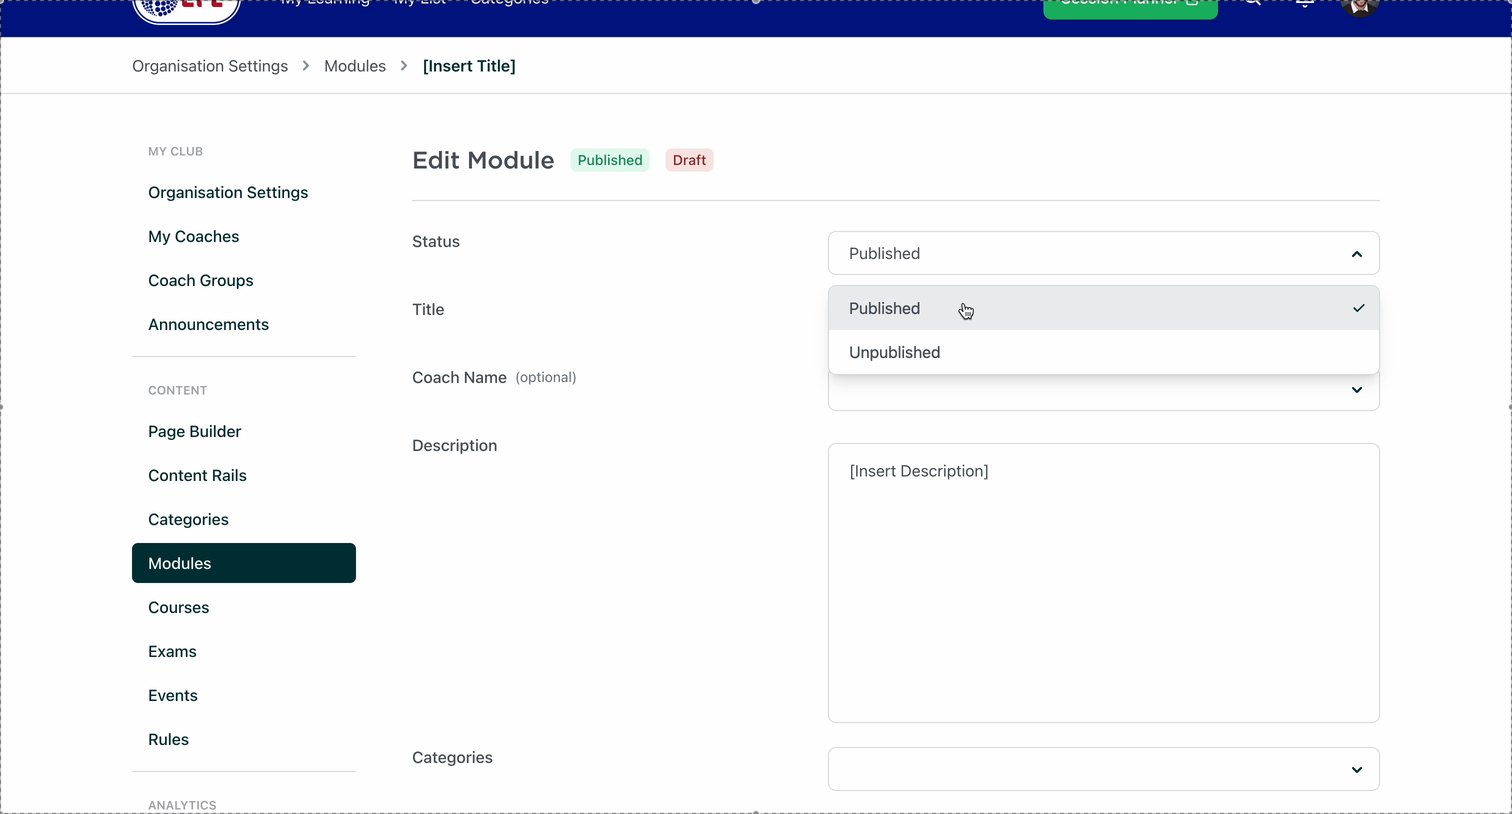
- Back in the module, set Status to Published and click Update.
Draft last saved means your changes are held as a draft. The green Module has been updated message confirms they’re live.
Step 13 — If your module says “Completed”
This is the one thing that catches people out. Read it before you report a bug.
The platform records your progress per coach. Once you have completed a module, it stays completed for your account — even after you change the content inside it.
So if your module shows Completed and you can’t see the changes you just made, the changes are almost certainly there. Your own progress record is what’s out of date.
To reset it:
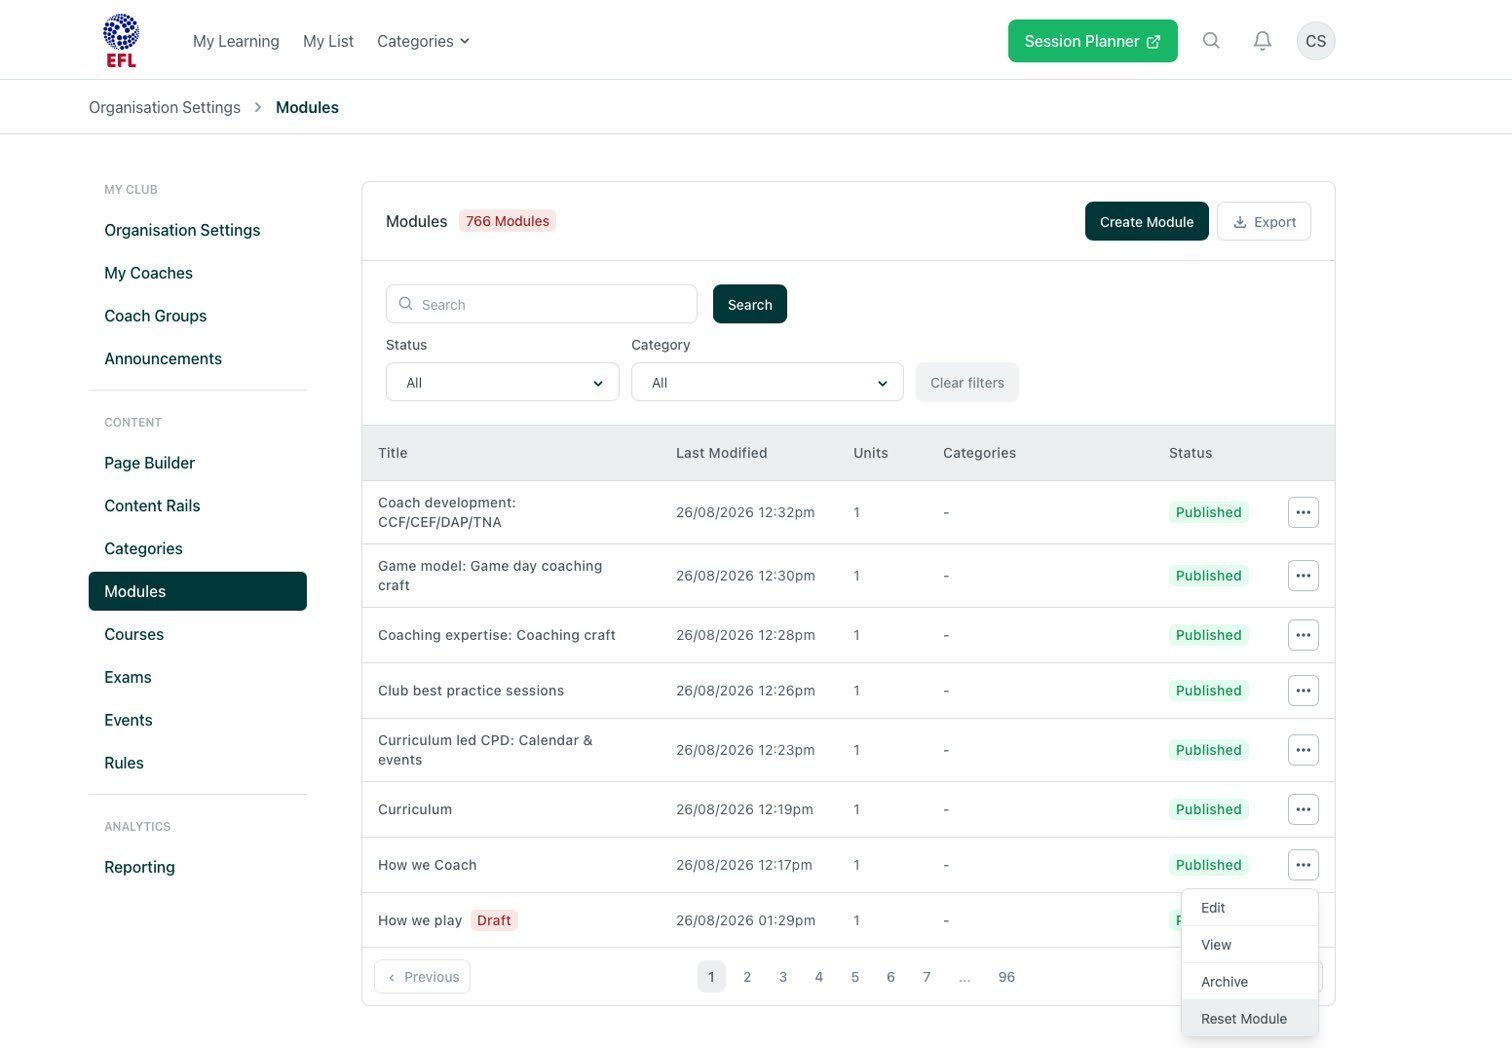
- Go to Organisation Settings and open Modules.
- Find your module in the list — use the Search box if it’s a long way down.
- Click the … button at the end of the module’s row.
- Choose Reset Module.
- Reopen the module — it starts again from scratch, with your new content.
So treat it as a build-phase tool:
- Safe — while you’re still building the module and your coaches haven’t started it yet.
- Not safe — once your coaches are working through a module. Resetting it then erases their completions, and the CPD record that goes with them.
If you need to update a module that’s already live with your coaches, change the content and leave the progress alone. Then tell your coaches what changed.
Step 14 — Now do the rest
You’ve built one module. Every other module in your two rails works exactly the same way.
Welcome to [Club Name]
- Curriculum led CPD: Calendar & events
- How we play
- How we coach
- Curriculum
[Club Name] Resources
- Club best practice sessions
- Coaching expertise: Coaching craft
- Game model: Game day coaching craft
- Coach development: CCF/CEF/DAP/TNA
Leave a module Unpublished while you build it, and publish it when it’s ready.
Stuck? Contact your EFL Coach Development contact at Coaches’ Voice.
Was this article helpful?
That’s Great!
Thank you for your feedback
Sorry! We couldn't be helpful
Thank you for your feedback
Feedback sent
We appreciate your effort and will try to fix the article